Vercel 除了能部署静态站点外,还能运行 Serverless Functions,也是本次的主题
创建接口
To deploy Serverless Functions without any additional configuration, you can put files with extensions matching supported languages and exported functions in the
/apidirectory at your project's root.
vercel 约定在目录下 api 下创建接口路径,这里创建 api/hello.js 文件,当然也支持 ts 以及 ESmodule 写法
export default function handler(request, response) {
  const { name } = request.query
  response.status(200).send(`Hello ${name}!`)
}
此时通过vc --prod生产环境部署后,在浏览器请求 vercel 提供的二级域名/api/hello?name=vercel 便可得到文本Hello vercel,而其函数写法与 express 类似
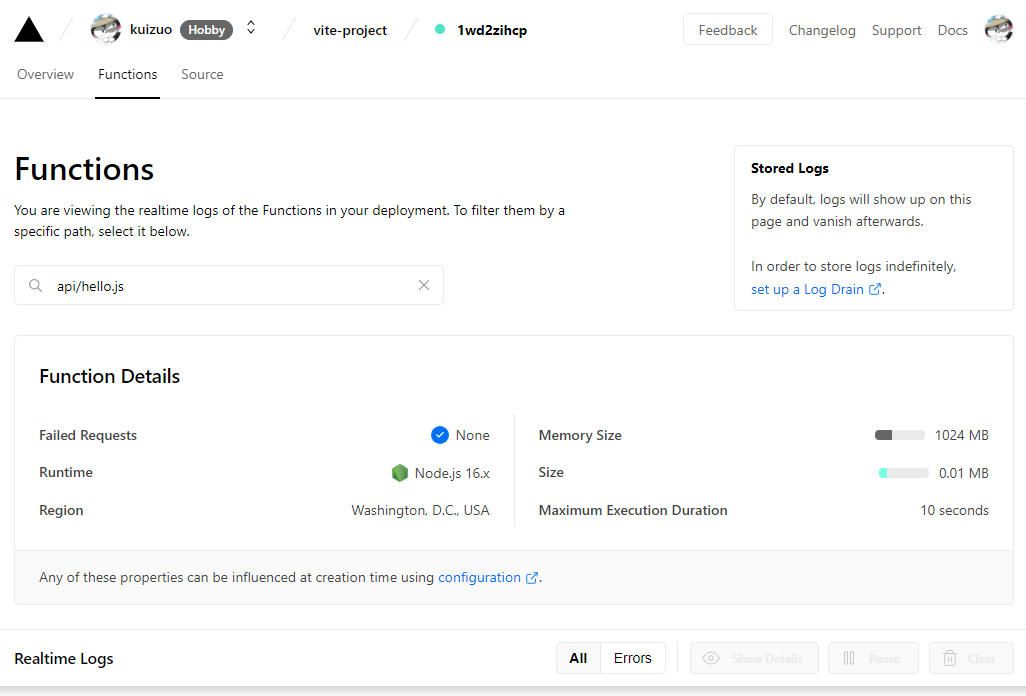
接口信息可以在 Functions 中查看

使用 typescript
不过上面是使用 js 写法,vercel 更推荐使用 TypeScript
安装 @vercel/node
npm i -D @vercel/node
将上面的 hello.js 改为 hello.ts,内容为
import type { VercelRequest, VercelResponse } from '@vercel/node'

export default (request: VercelRequest, response: VercelResponse) => {
  const { name } = request.query
  response.status(200).send(`Hello ${name}!`)
}
此外还可以使用其他语言,这里为 Vercel 所支持的语言
开发环境
上面创建的例子是在生产环境下进行的,vercel 官方非常贴心的提供了 vercel dev 来用于开发环境(本地调试)。
vercel dev
执行后,将会默认开启 3000 端口来启动服务,此时访问 http://localhost:3000/api/hello 就可调用该接口
vercel.json
在根目录创建vercel.json,用于设置 Vercel 项目配置 ,其配置结构与 Nextjs 的 next.config.js 大体一致。
headers
vercel 允许响应携带自定义的协议头,例如设置允许跨域的协议头。
{
  "headers": [
    {
      "source": "/(.*)",
      "headers": [
        {
          "key": "Access-Control-Allow-Origin",
          "value": "*"
        },
        {
          "key": "Access-Control-Allow-Headers",
          "value": "content-type"
        },
        {
          "key": "Access-Control-Allow-Methods",
          "value": "DELETE,PUT,POST,GET,OPTIONS"
        }
      ]
    }
  ]
}
rewrites
Vercel 支持路由重写功能,因此我们可以实现反向代理。
例如将前缀为/proxy 的所有请求都代理到 http://127.0.0.1:5000,其写法如下
{
  "rewrites": [{ "source": "/proxy/:match*", "destination": "http://127.0.0.1:5000/:match*" }]
}
请求/proxy/hello 将会请求到 http://127.0.0.1:5000/hello(不带有/proxy)
注意无法代理前缀为/api 的接口,即使设置了也无效。
redirects 和 rewrites 区别
除了 rewrites 还有一个 redirects,也就是重定向,response 返回 3xx 的状态码和 location 头信息。
而 rewrites 重写内部转发了请求,地址栏不会发生改变,并且状态码由转发的请求决定。
并且 redirects 是先被调用的,而 rewrites 是后被调用的。
functions
可以设置指定接口分配的内存以及最大执行时间。默认下
- Memory: 1024 MB (1 GB)
- Maximum Execution Duration: 5s (Hobby), 15s (Pro), or 30s (Enterprise)
个人用户接口超时时间最长为 5 秒。
部署 Node 项目
可以使用 vercel.json 配置来覆盖 vercel 默认行为,也就能使用 Vercel 部署 Node 项目。
假设要部署一个 Express 项目,则配置如下
{
  "builds": [
    {
      "src": "app.js",
      "use": "@vercel/node"
    }
  ]
}
安装 @vercel/node包
npm i @vercel/node -D
然后运行 vercel,而不是vercel --prod
部署 Nest.js
这里有个部署 Nest.js 项目的教程 基于 Vercel+Github Action 部署 Nest.js 项目 - 掘金 (juejin.cn)
其 vercel.json 如下
{
  "builds": [
    {
      "src": "dist/main.js",
      "use": "@vercel/node"
    }
  ],
  "routes": [
    {
      "src": "/(.*)",
      "dest": "dist/main.js"
    }
  ]
}
然后执行 vercel --prod(因为 nest 项目需要 build 打包)
最后
Vercel 十分良心,为个人用户提供了免费的爱好者计划,每个月提供 100G 流量,构建时间是 100 小时,50 个根域名绑定。
